
The fastest way to speed up boot in Windows 11 is to disable unnecessary startup apps, confirm Fast Startup is enabled, and verify your drive is first in the boot order. For most users, those three steps alone cut several seconds off every cold boot.
Here is your quick action plan:
- Disable startup apps in Task Manager (1–3 min) — the single highest-impact nontechnical fix
- Confirm Fast Startup is on (1 min) — Control Panel → Power Options → Choose what the power buttons do
- Check boot order in UEFI/BIOS (2–5 min) — internal drive should be first; disable USB/network boot
- Switch to Sleep instead of full shutdown (30 sec) — resumes in seconds, skips firmware boot entirely
- Run a quick malware scan (5 min) — background infections are a common hidden cause of slow startup
- Measure first — open Event Viewer's Diagnostics-Performance log to confirm where time is actually being lost before changing anything
That last point matters more than most guides admit. Windows records every boot phase in Event Viewer, and Tempered's AI diagnostics can surface the same data without you navigating log files manually. Measure the bottleneck, then fix it.
Table of Contents
- 1. Five quick fixes you can try right now
- 2. How to find and disable startup programs in Task Manager
- 3. Windows Fast Startup: what it does and when to turn it off
- 4. Safe UEFI/BIOS tweaks that often cut boot time
- 5. Upgrading to an SSD: expected gains, costs, and what to check first
- 6. Why Sleep or Hibernate beats a cold boot for daily use
- 7. Ongoing maintenance that keeps boot times from creeping back up
- 8. How to measure boot time and find the real bottleneck
- 9. Does ReadyBoost still help in Windows 11?
- 10. Registry cleaning: what actually helps and what to skip
- 11. Third-party boot optimization tools: what they offer and where they go wrong
- 12. Adjusting virtual memory and pagefile settings for faster startup
- Key Takeaways
- The fix most people skip
- What Tempered does that manual steps cannot
- Authoritative sources and official guidance
1. Five quick fixes you can try right now
These take 5–15 minutes each and carry almost no risk. Work through them in order before touching firmware or hardware.
Free up OS drive space (5 min). Windows needs room to breathe. Keep a healthy amount of free space on your OS drive for update staging and temporary files. Open Storage Sense (Settings → System → Storage → Storage Sense) and let it run. For a deeper clean, see the disk cleanup steps for Windows 11 that cover what Storage Sense misses.
Run a quick malware scan (5–10 min). Open Windows Security → Virus & threat protection → Quick scan. Background malware processes are a surprisingly common cause of sluggish startup, and the built-in scanner catches most common threats.
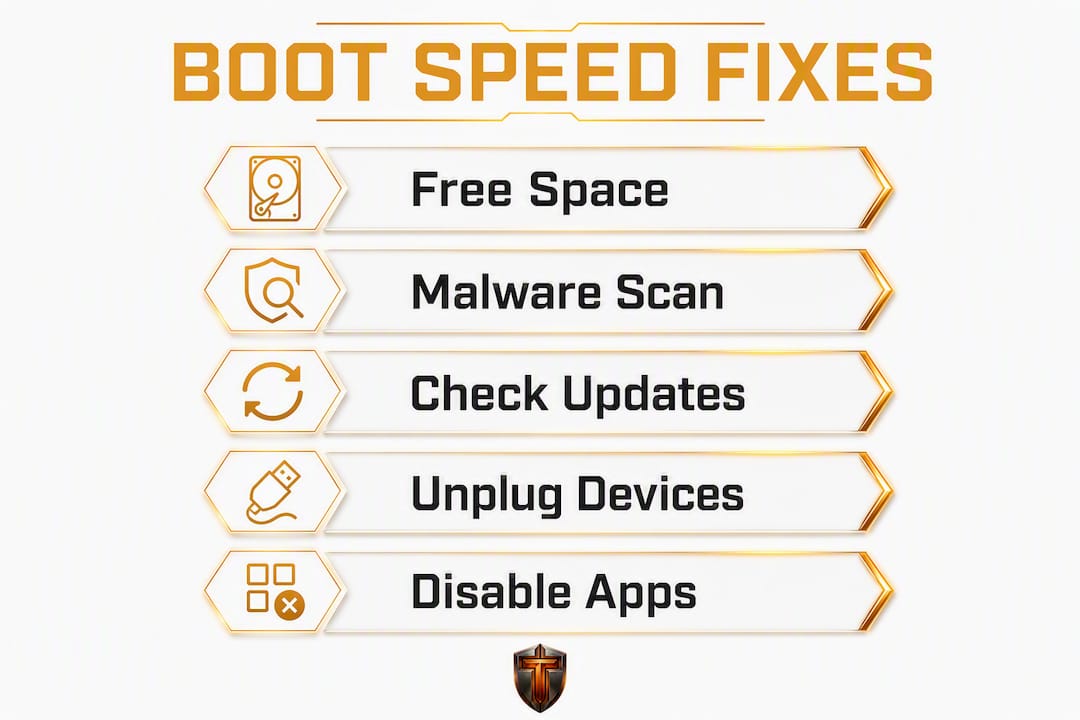
Check for a stuck Windows Update (2 min). Go to Settings → Windows Update. A pending update that never finished can hold boot processes hostage. If one is stuck, restart using the "Restart now" option rather than Shut Down, since a proper restart flushes the update queue in a way a cold boot after Fast Startup does not.
Unplug external drives and docks before testing (1 min). External devices and wrong boot order can add seconds before Windows even starts loading. Disconnect USB drives, SD cards, and docking stations, then do a clean cold boot to get a real baseline.
Undo any of these? Re-enabling a startup app takes ten seconds in Task Manager. Storage Sense deletions are permanent for temp files but never touch personal files by default. The malware scan changes nothing on its own.
Pro Tip: Time three consecutive cold boots with a stopwatch, recording power-on to the moment you can click the Start menu. Average them. That number is your baseline — you need it to know whether any change actually helped.
2. How to find and disable startup programs in Task Manager
Disabling unnecessary startup apps is one of the most effective nontechnical ways to reduce the time it takes for a PC to become usable after boot, and hands-on tests confirm real seconds saved. Here is the exact workflow.
- Press Ctrl + Shift + Esc to open Task Manager.
- Click the Startup apps tab (Windows 11) or Startup tab (Windows 10).
- Click the Startup impact column header to sort by impact — High items load first.
- Right-click any nonessential app and choose Disable. Good candidates: chat apps, cloud sync clients, update helpers for software you rarely use, and OEM utility launchers.
- Leave antivirus, audio drivers, and any app you genuinely use within the first five minutes of logging in.
- Restart, time the boot, and compare to your baseline.
Alternate view: Settings → Apps → Startup gives the same list with toggle switches and a cleaner layout, though it lacks the "Startup impact" column that Task Manager shows. Use Task Manager for triage, Settings for day-to-day management.
To undo: return to Task Manager → Startup apps, right-click the item, and choose Enable. The change takes effect on the next restart.

[Screenshot location: insert Task Manager Startup apps tab with High-impact items highlighted.]
Vendor bloatware is often the worst offender here. OEM machines frequently ship with a dozen startup items you never asked for. The guide to removing bloatware on Windows 11 covers how to identify and remove those at the source rather than just disabling them at startup.
3. Windows Fast Startup: what it does and when to turn it off
Fast Startup is a hybrid hibernation feature. When you shut down with it enabled, Windows saves the kernel session and loaded drivers to a hibernation file (hiberfil.sys) instead of fully powering off. On the next boot, it reloads that file rather than reinitializing everything from scratch.
On HDD systems, Fast Startup can significantly cut startup time. The gain is smaller on SSDs because SSDs already initialize quickly, but it still helps.
Statistic: Fast Startup reduces boot time significantly on HDD-based systems, often yielding boot times that are 30–60% faster.
How to toggle it:
- Open Control Panel → Power Options.
- Click Choose what the power buttons do (left sidebar).
- Click Change settings that are currently unavailable.
- Check or uncheck Turn on fast startup (recommended).
- Click Save changes.
When to disable it:
- You dual-boot Windows and Linux. Fast Startup locks the NTFS partition, which can corrupt the Linux filesystem.
- You need to access UEFI/BIOS settings. Fast Startup skips the firmware handshake, so the BIOS key press is often ignored.
- A driver update is not applying correctly. Fast Startup preserves the old driver state, hiding the update.
- You are troubleshooting a hardware change. A full cold boot clears the saved state and gives you a clean read.
Pro Tip: When Fast Startup is on, "Shut Down" is not a true shutdown. Use Restart instead when applying updates or swapping hardware — Restart always performs a full boot cycle regardless of Fast Startup state.
4. Safe UEFI/BIOS tweaks that often cut boot time
Most of these take under five minutes and require no technical background. Enter UEFI by pressing the firmware key at startup (commonly Del, F2, or F10 depending on your OEM).
Safe tweaks to check:
- Boot order: Set your internal SSD or NVMe as the first boot device. Every device listed above it adds a timeout delay.
- Disable USB boot and Network/PXE boot if you never boot from USB drives or network. Each enabled option adds a probe delay.
- Enable UEFI Fast Boot (distinct from Windows Fast Startup). This skips hardware initialization checks that are only needed for troubleshooting.
- Check SATA mode: If it reads AHCI, leave it. Do not switch between IDE and AHCI without preparation — Windows will fail to boot without a driver pre-install step.
Firmware update checklist:
- Back up your data before updating firmware.
- Read the release notes: look specifically for "storage controller," "NVMe," or "boot" fixes.
- Use your OEM's official tool (Dell SupportAssist, HP Support Assistant, Lenovo System Update) rather than third-party flashers.
- Keep the laptop plugged in or the desktop on a UPS during the flash. A power cut mid-update can brick the board.
External devices and incorrect boot order are a common source of pre-Windows delays, so fixing boot order alone sometimes produces an immediate, noticeable improvement.
5. Upgrading to an SSD: expected gains, costs, and what to check first
If your PC still runs on a spinning hard drive, no software tweak will match what an SSD delivers. The physics are simply different: an HDD reads sequentially at roughly 100–150 MB/s with millisecond seek times, while a SATA SSD delivers 500+ MB/s and a mid-range NVMe hits 3,000–7,000 MB/s. Boot times that are long on an HDD routinely drop substantially on an NVMe drive.
Compatibility checklist before buying:
- Open Device Manager → Disk drives to confirm your current drive type.
- Check whether your motherboard has an M.2 slot (for NVMe) or only a 2.5-inch SATA bay.
- Verify BIOS supports NVMe boot — most boards from 2015 onward do, but check your manual.
- Pre-install the NVMe driver in Windows before cloning if your board needs a specific chipset driver.
Approximate price bands (US market, 2025–2026): Entry-level SATA SSDs (500 GB) cost generally affordable amounts in the US market. Mid-range NVMe drives (1 TB) sit around $60–$100. A local shop typically charges $50–$100 for labor on a straightforward swap, making same-day installation realistic.
Clone vs. clean install: Cloning preserves your apps and settings but carries over any existing bloat. A clean Windows install takes longer but gives you the fastest possible baseline. Either way, keep a backup before you start. Monitoring SSD health after the swap confirms the new drive is performing as expected.
Pro Tip: If you already have an SSD and boot is still slow, the bottleneck is almost certainly startup apps or drivers, not the drive itself. Run the Event Viewer diagnostic in Section 9 before spending money on faster storage.
6. Why Sleep or Hibernate beats a cold boot for daily use
For most users, Sleep mode provides an effectively instant return to work and avoids firmware boot cycles entirely. If you are rebooting multiple times a day just to get a fast start, switching to Sleep is the simplest fix with zero configuration required.
| Mode | Resume time | Power use | Works with updates? | Dual-boot risk |
|---|---|---|---|---|
| Sleep | 1–3 seconds | Low (RAM stays powered) | No — delays update installs | None |
| Hibernate | 10–20 seconds | Near zero (state saved to disk) | No — same as Sleep | Low |
| Shut Down + Fast Startup | 10–20 seconds | Zero | Partial — use Restart for updates | Yes (NTFS lock) |
| Full cold boot (Restart) | 20–60+ seconds | Zero | Yes | None |
Configure Sleep: Settings → System → Power & sleep. Set "When plugged in, PC goes to sleep after" to your preferred idle time. For laptops, set a separate on-battery value.
Common pitfalls: Some docking stations and older USB hubs cause wake failures. If your PC wakes but the display stays black, update the dock firmware and the display adapter driver. Hibernate is the safer choice for laptops you carry in a bag, since Sleep still draws a small amount of power.
For a deeper comparison of when each mode makes sense, the hibernate vs. sleep breakdown covers edge cases like hybrid sleep and connected standby.
7. Ongoing maintenance that keeps boot times from creeping back up
Boot time is not a one-time fix. Without a maintenance rhythm, startup apps accumulate, drivers go stale, and disk health degrades quietly.
Monthly tasks:
- Check for driver and firmware updates via your OEM tool or Device Manager.
- Run
sfc /scannowin an elevated Command Prompt to catch corrupted system files. - Run
chkdsk C: /scanto check disk integrity without requiring a reboot. - Open Defragment and Optimize Drives (search the Start menu) and confirm SSDs show "OK (0% fragmented)" and HDDs are optimized.
Weekly tasks:
- Verify OS drive free space stays above 15–20%.
- Run a quick malware scan via Windows Security.
When to go deeper: If boot time starts creeping up despite clean maintenance, open Reliability Monitor (search the Start menu) and look for red X marks near the date the slowdown started. Event Viewer's Diagnostics-Performance log (covered in the next section) gives you the precise phase where time is being lost.
Pro Tip: Run Windows Update via Restart, not Shut Down, every time. A Shut Down with Fast Startup enabled can leave pending updates in a half-applied state that slows the next boot.
If you notice a pattern of computer running slow beyond just boot time, the issue may be deeper than startup configuration.
8. How to measure boot time and find the real bottleneck
Guessing at the cause of a slow boot leads to unnecessary changes and sometimes makes things worse. Separating the boot into stages — firmware delay, driver load, sign-in delay, post-login startup — lets you target the actual problem.
Step-by-step diagnostic workflow:
- Time three cold boots with a stopwatch. Record four timestamps per boot: power-on, OEM logo appears, sign-in screen appears, desktop is fully clickable. Average each stage across three runs.
- Open Event Viewer: Press Win + R, type
eventvwr, press Enter. Navigate to Applications and Services Logs → Microsoft → Windows → Diagnostics-Performance → Operational. - Find Event ID 100. This is the boot performance measurement event. It records MainPathBootTime and BootPostBootTime — the two numbers that tell you where time went.
- Interpret the numbers: A high MainPathBootTime points to firmware or driver issues. A high BootPostBootTime points to startup apps and services loading after login.
- Run a clean boot if startup apps are suspect: open
msconfig→ Services tab → check "Hide all Microsoft services" → Disable all → restart. If boot improves, re-enable services in batches to isolate the culprit.
Where is the delay?
| Delay stage | Likely cause | First fix to try |
|---|---|---|
| Before OEM logo | Firmware/boot order | UEFI boot order, disable USB/PXE boot |
| OEM logo to spinning dots | Storage driver or SATA mode | Driver update, check AHCI mode |
| Spinning dots to sign-in | Windows driver load | Event ID 100, clean boot |
| After login to usable desktop | Startup apps/services | Task Manager Startup tab |
Measure before changing anything — many slow-boot reports are temporary because Windows performs background maintenance after updates, and troubleshooting during that window leads to false positives.
9. Does ReadyBoost still help in Windows 11?
ReadyBoost lets Windows use a USB flash drive or SD card as a read cache, which was genuinely useful when HDDs were standard. The feature still exists in Windows 11: right-click a USB drive in File Explorer, choose Properties, and select the ReadyBoost tab.
The honest answer is that ReadyBoost rarely helps on a modern system. If your OS drive is an SSD, Windows automatically disables ReadyBoost because the SSD is already faster than any USB cache. On an HDD system, ReadyBoost can shave a few seconds off post-login app loading, but the effect is modest compared to simply disabling startup apps or upgrading to an SSD.
If you are on an HDD and cannot upgrade yet, ReadyBoost is worth a try. Use a USB 3.0 drive with at least 4 GB free and a fast random-read speed. Do not expect dramatic results.
10. Registry cleaning: what actually helps and what to skip
Registry cleaners are one of the most oversold categories in PC optimization. The Windows registry accumulates orphaned entries over time — leftover keys from uninstalled software — but the performance impact of those entries on boot time is minimal in practice. Windows does not scan every registry key at startup; it reads specific paths relevant to the current boot sequence.
That said, a genuinely corrupted or malformed registry entry can cause a specific driver or service to fail to load, which does slow boot. The right tool for that is sfc /scannow, not a third-party cleaner. System File Checker repairs corrupted system files and registry references without the risk of deleting keys that a cleaner might misidentify as orphaned.
If you want to remove leftover entries from uninstalled software, the safest approach is to use the software's own uninstaller (or a reputable tool like Revo Uninstaller) at the time of removal, rather than running a registry sweep months later. Always create a restore point before any registry work.
11. Third-party boot optimization tools: what they offer and where they go wrong
Third-party optimizers range from genuinely useful to actively harmful. The useful ones surface data you could find yourself but faster — startup app managers, service analyzers, and boot-time loggers. The harmful ones make aggressive changes (disabling services, modifying registry keys, altering driver settings) without clear undo paths.
What to look for in a legitimate tool:
- Transparent about what it changes and why
- Provides a one-click undo or restore point before any change
- Does not bundle adware or require disabling Windows Defender to install
- Reads live hardware metrics rather than relying on static rule sets
What to avoid: Tools that promise "one-click speed boosts" without showing you what they changed, or that require you to disable security software. Unverified driver updaters are a particular risk — they sometimes install unsigned or mismatched drivers that cause boot failures.
Tempered takes a different approach: its AI scans live CPU, RAM, disk, and uptime metrics, then recommends specific changes with plain-language explanations. Every change is logged in the Undo Center, so nothing is irreversible. That is the standard any third-party tool should meet.
12. Adjusting virtual memory and pagefile settings for faster startup
Windows manages the pagefile automatically by default, and for most users that is the right setting. The pagefile is virtual memory on disk that Windows uses when RAM fills up. At boot, Windows initializes the pagefile, which adds a small amount of time proportional to pagefile size.
When manual adjustment makes sense:
- You have 16 GB or more of RAM and rarely run memory-intensive workloads. Setting a smaller, fixed pagefile (e.g., 1,024 MB initial and maximum) reduces initialization time slightly.
- You have multiple drives. Moving the pagefile to a secondary SSD frees the OS drive's I/O bandwidth during boot.
How to adjust: Search "Advanced system settings" → Performance → Settings → Advanced tab → Virtual memory → Change. Uncheck "Automatically manage" to set custom values.
What not to do: Do not disable the pagefile entirely. Even with 32 GB of RAM, some applications and Windows components require a pagefile to exist. Disabling it can cause application crashes and, in rare cases, boot failures.
The RAM usage guide for Windows covers how to check whether RAM pressure at startup is actually contributing to your slow boot before you touch pagefile settings.
Key Takeaways
Disabling startup apps, confirming Fast Startup, and measuring boot phases with Event Viewer covers the majority of Windows 11 boot slowdowns before any hardware change is needed.
| Point | Details |
|---|---|
| Measure before changing anything | Use Event Viewer Event ID 100 to find whether MainPathBootTime or BootPostBootTime is high. |
| Startup apps are the top nontechnical fix | Sort by Startup impact in Task Manager and disable High-impact nonessential apps first. |
| Fast Startup helps HDDs most | Boot times are typically 30–60% faster on hard drives with Fast Startup enabled, according to HP Tech Takes. Disable it for dual-boot or driver troubleshooting. |
| SSD upgrade is the biggest hardware win | HDD-to-SSD swaps routinely cut boot from 60 seconds to 10–15 seconds; entry-level SATA SSDs start around $40–$60. |
| Tempered automates the diagnostic workflow | Tempered's AI scans live boot metrics, identifies startup culprits, and logs every change in its Undo Center for safe rollback. |
The fix most people skip
Most boot-optimization guides hand you a list of tweaks and send you off. The problem is that the same list applies whether your delay is 5 seconds or 45 seconds, whether it is in the firmware stage or the post-login stage. That is backwards.
The single most underused step is measuring the boot in phases before touching anything. A 40-second boot where 35 seconds happen before the OEM logo is a firmware or boot-order problem. A 40-second boot where the OEM logo appears in 8 seconds but the desktop takes another 32 seconds is a startup-app problem. Those two machines need completely different fixes, and applying the wrong one wastes time and introduces risk.
The other mistake I see constantly: people disable services they do not recognize. Windows 11 runs dozens of services at startup, and most of them are there for a reason. Disabling the wrong one can break networking, audio, or Windows Update in ways that are annoying to diagnose. The clean boot method in msconfig is the right tool for service isolation — it disables third-party services only, leaving Windows services intact.
Registry cleaners deserve a specific warning. The performance gain from cleaning orphaned registry entries is negligible for boot time, and an aggressive cleaner can delete keys that legitimate software still references. Run sfc /scannow instead. It is free, built-in, and actually fixes things.
Finally: create a restore point before any significant change. It takes 30 seconds and has saved hours of recovery work. If you use Tempered, the Undo Center handles this automatically for every change the tool makes.
What Tempered does that manual steps cannot
Manual diagnostics work, but they require navigating Event Viewer logs, interpreting cryptic event IDs, and remembering which services are safe to disable. Tempered cuts through that.
The AI engine reads your live CPU, RAM, GPU, and disk metrics in real time, identifies which startup items are actually costing you boot time, and explains each recommendation in plain language. No log files, no guesswork. Every change Tempered makes is logged in the Undo Center, so you can reverse anything with one click if something does not feel right. For gamers, the Game Mode feature goes further, suppressing background processes during sessions so the performance you freed up at boot stays freed up while you play.
The free tier covers basic AI scans and is a solid starting point. The Torque and Torque Max plans unlock unlimited scans and advanced diagnostics for users who want ongoing monitoring rather than a one-time fix. Try Tempered and see what your boot metrics actually look like.
Authoritative sources and official guidance
These are the primary references used throughout this article.
- How to Improve Boot Time in Windows 11 — Microsoft Q&A: Microsoft's community guidance on boot performance, covering Fast Startup, startup apps, and driver considerations.
- Shut down, sleep, or hibernate your PC — Microsoft Support: Official Microsoft documentation on power states, including how Fast Startup interacts with Shut Down vs. Restart.
- How to Optimize Fast Startup in Windows 10 & 11 — HP Tech Takes: Source for the 30–60% boot-time reduction figure on HDD systems and a practical walkthrough of Fast Startup configuration.
- I Disabled Windows Startup Apps — Here's How Much Faster My PC Boots — How-To Geek: Hands-on test data confirming measurable boot-time reductions from disabling startup apps.