
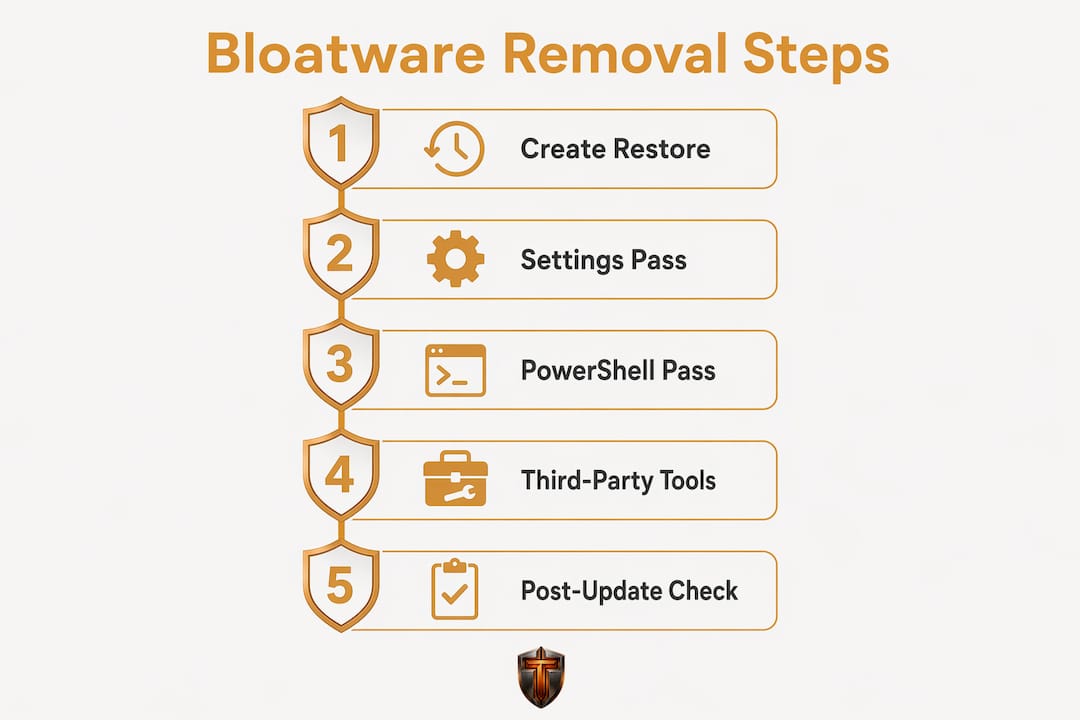
Start with a System Restore point, then open Settings → Apps → Installed apps and uninstall everything you recognize as unwanted. For apps with no uninstall button, move to PowerShell. For permanent, system-wide removal, use Group Policy or DISM. That three-pass sequence covers the vast majority of Windows 11 bloatware without touching anything critical.
Before you touch a single app:
- Open the Start menu, search Create a restore point, and create one now.
- Go to Settings → Apps → Installed apps, sort by install date, and write down what you plan to remove (your keep/remove list).
- Note any app whose uninstall button is greyed out — those need PowerShell or DISM, not the Settings UI.
Pro Tip: Keep your list in a text file. After a major Windows feature update, apps can return, and your list tells you exactly what to re-remove.
Table of Contents
- How to tell which Windows 11 apps are actually bloatware
- Manual uninstall: Settings, Start menu, and Optional features
- PowerShell removal: user packages, provisioned packages, and safe rollback
- Admin and at-scale options: Group Policy, DISM, and deployment scripts
- Pre-debloat safety checklist: what to do before removing anything
- Trusted third-party tools: when a GUI makes sense
- How to reinstall removed apps or restore defaults
- Make removals stick: stopping auto-reinstall after updates
- Key Takeaways
- The workflow I'd actually recommend
- Tempered handles the safe optimization work for you
- Primary sources and further reading
How to tell which Windows 11 apps are actually bloatware
Not every preinstalled app is junk. The distinction matters because removing the wrong component can break Windows Update, Windows Security, or hardware drivers.
An app qualifies as bloatware when it meets one or more of these criteria:
- You never use it and it runs background processes (check Task Manager → Startup apps).
- It's third-party trialware — antivirus trials, game launchers, or subscription pitches from the PC manufacturer.
- It's a pinned installer link, not a real installed app. These are Start menu tiles that download the actual app when clicked. They look installed but aren't.
- It duplicates something you already have — a second browser, a second media player, a second notes app.
- It's a manufacturer helper app with no clear function (update assistants, "experience" apps, companion utilities).
Common removable culprits on a fresh Windows 11 install include McAfee or Norton trials, Candy Crush and similar games, Xbox apps you don't use, Clipchamp, the Microsoft News app, and OEM tools like HP Support Assistant or Dell SupportAssist. New PCs often ship with a significant amount of this kind of removable software.
One signal that an app is protected: its uninstall option is greyed out in Settings, or PowerShell returns HRESULT 0x80073CFA when you try to remove it. That error means Windows considers the app a protected system component. Stop there and do not force it.

Manual uninstall: Settings, Start menu, and Optional features
This pass handles the majority of obvious bloat and requires no elevated tools. Work through it before reaching for PowerShell.
- Settings → Apps → Installed apps. Sort by Install date to surface everything that arrived with the OS. Click the three-dot menu next to any app and select Uninstall. Confirm when prompted.
- Start menu right-click. For apps pinned to Start, right-click the tile and select Uninstall. This works for most Microsoft Store apps and is faster than navigating Settings.
- Optional features. Go to Settings → System → Optional features for smaller components like Internet Explorer mode, Windows Media Player Legacy, or handwriting tools. Remove anything you don't need.
- Pinned installer links. If right-clicking a Start tile shows Uninstall but nothing actually disappears from your installed apps list, it was a placeholder link, not a real app. Right-click and choose Unpin from Start instead.
- Control Panel fallback. Older desktop programs (Win32 apps) sometimes don't appear in Settings. Open Control Panel → Programs → Programs and Features and uninstall from there.
When the uninstall button is greyed out entirely, Microsoft Support notes that some apps are built into Windows and cannot be removed through the UI. That's your cue to move to PowerShell — or to leave it alone if you're not comfortable with the command line.
Pro Tip: Sort Installed apps by size, not just date. Large apps you've never opened are the highest-value targets for reclaiming disk space.
PowerShell removal: user packages, provisioned packages, and safe rollback
PowerShell gives you access to apps the Settings UI won't touch. The key distinction: Remove-AppxPackage removes an app for the current user only. To remove it for all users and prevent it from appearing on new accounts, you need to remove the provisioned package.

List what's installed:
Get-AppxPackage | Select Name, PackageFullName
Remove for the current user (wildcard example):
Get-AppxPackage *CandyCrush* | Remove-AppxPackage
List provisioned packages (all users / new accounts):
Get-AppxProvisionedPackage -Online | Select DisplayName, PackageName
Remove a provisioned package:
Remove-AppxProvisionedPackage -Online -PackageName "Microsoft.CandyCrushSaga_1.0.0.0_neutral_~_kgqvnymyfvs32"
Use wildcards (*AppName*) when you don't know the exact package name. Use the full PackageFullName when you want precision and don't want to accidentally catch a similarly named component.
If PowerShell returns HRESULT 0x80073CFA, stop. That app is a protected system component. Forcing removal with DISM or unsupported workarounds can break Windows Update, Windows Security, or other core features. Leave it alone.
DISM can also remove provisioned packages from a running system using /Online:
DISM /Online /Remove-ProvisionedAppxPackage /PackageName:"PackageNameHere"
To reinstall a removed app, open the Microsoft Store and search for it. Or use PowerShell:
Add-AppxPackage -Path "C:\Path\To\Package.appx"
Pro Tip: Test removals on a secondary Windows account before applying them system-wide. If something breaks on the test account, your main profile stays intact.
Winget is a cleaner alternative for apps that have a winget ID. winget list shows everything; winget uninstall "App Name" removes it. The syntax is simpler than AppxPackage commands and works well for removing third-party apps like Spotify or LinkedIn that ship preinstalled.
Admin and at-scale options: Group Policy, DISM, and deployment scripts
For IT admins or power users managing multiple machines, one-off Settings removals don't scale. These methods bake changes into the system or prevent apps from returning.
- Block installer links with Group Policy. Open
gpedit.msc→ Computer Configuration → Administrative Templates → Windows Components → Cloud Content → enable "Turn off cloud optimized content." This stops Windows from auto-downloading suggested app installer links to the Start menu. After enabling it, reset the Start menu cache by deleting%LocalAppData%\Packages\Microsoft.Windows.StartMenuExperienceHost_cw5n1h2txyewy\LocalStateand signing out and back in. - DISM offline image servicing. When building a base image, mount the WIM file and remove provisioned packages before deployment:
This is cleaner than removing apps after deployment because the packages never exist on end-user machines.DISM /Image:"C:\Mount" /Remove-ProvisionedAppxPackage /PackageName:"PackageNameHere" - DISM /Online for live systems. Use
/Onlineinstead of/Imageto modify a running system. Useful for one-off admin tasks but less reliable than image-level changes for fleet management. - PowerShell scripts with an allowlist. PDQ recommends building a script that explicitly lists apps to keep rather than apps to remove. An allowlist approach is safer because it won't accidentally remove something added in a future update that shares a name pattern with a removal target.
- Stage your rollout. Test on a fresh image, deploy to a pilot group of five to ten machines, wait one week, then roll out broadly. Re-run the script after each major Windows feature update.
Pro Tip: Run your debloat script in audit mode first — log what would be removed without actually removing it. Review the log before committing.
Pre-debloat safety checklist: what to do before removing anything
Skipping this step is how people end up with a broken Start menu or a missing system component. Five minutes here saves hours of recovery.
- Create a System Restore point (search Create a restore point in Start → click Create). This is your fastest recovery option for most mistakes.
- Create a full disk image for major changes. Windows' built-in Backup and Restore (Windows 7) tool or a third-party imaging tool gives you a complete fallback.
- Write your keep/remove list before starting. Document every app you plan to remove and why. This list also becomes your re-run checklist after feature updates.
- Export your current app list with
Get-AppxPackage | Select Name > C:\apps_before.txtso you have a baseline. - Test on a secondary account or VM first. A virtual machine running Windows 11 is the safest sandbox for testing aggressive removals.
- Plan for update recurrence. Major Windows feature updates commonly re-install consumer apps and pinned links. Schedule a re-audit after every major update — treat debloating as periodic maintenance, not a one-time task.
Undo steps if something breaks: restore the System Restore point (search Recovery → Open System Restore), reinstall specific apps from the Microsoft Store, or use Add-AppxPackage for apps you removed via PowerShell. A full disk image restore is the nuclear option if the system won't boot.
Trusted third-party tools: when a GUI makes sense
GUI tools are worth using when you're dealing with manufacturer bloat that doesn't show up cleanly in Settings, or when you want a faster visual audit of everything installed. Two tools appear consistently in coverage:
- O&O AppBuster scans for hidden and provisioned packages, shows apps by category (Microsoft, OEM, third-party), and lets you remove them individually or in bulk. It surfaces packages that PowerShell lists but that most users wouldn't know to search for. Download only from the official O&O Software page.
- BCUninstaller (Bulk Crap Uninstaller) is open-source and hosted on GitHub. It handles both Win32 programs and Store apps, detects leftovers after uninstall, and can run in quiet mode for batch removals. It's particularly good for cleaning up manufacturer helper apps that leave registry traces.
Community debloat scripts like Win11Debloat variants are widely used but carry real risk if you run them without reading the code first. They can remove apps you actually want, and some circulate in modified forms with added payloads. Inspect the script, check the GitHub commit history, and test on a spare machine before running on your main system.
Security checklist before using any third-party tool:
- Download from the official project site or a verified GitHub release page only.
- Check that the project has been updated within the past 12 months.
- Read the changelog — active maintenance is a trust signal.
- Create a restore point immediately before running it.
Pro Tip: A staged three-pass approach — Settings first, then PowerShell, then a GUI tool for manufacturer apps — takes roughly 30 minutes on a fresh install and covers nearly everything without over-reaching.
How to reinstall removed apps or restore defaults
Removed something you need? Recovery is straightforward in most cases.
- Microsoft Store reinstall. Open the Store, search for the app by name, and click Install. This works for nearly all first-party Microsoft apps including Photos, Calculator, and the Xbox app.
- PowerShell reinstall. If the app isn't in the Store or you want to reinstall from a package file:
For provisioned packages, useAdd-AppxPackage -Path "C:\Path\To\Package.appx"Add-AppxProvisionedPackagewith the appropriate source path. - Restore a provisioned package from the Windows installation media. Mount the ISO, locate the appx bundle in the
\AppXfolder, and useAdd-AppxProvisionedPackage -Onlineto restore it system-wide. - Windows Reset / Fresh Start. Go to Settings → System → Recovery → Reset this PC. The Keep my files option preserves personal files but removes installed apps and resets settings. Use this when multiple system components are broken and targeted reinstalls aren't working.
A few apps to leave alone: Microsoft Edge and Windows Security (Defender) are deeply integrated into the OS. Removing Edge breaks certain system UI elements that call it directly. Removing Windows Security without a replacement antivirus leaves you unprotected. If you've already removed them and something is broken, a Windows Reset is usually the cleanest path back.
Make removals stick: stopping auto-reinstall after updates
A one-time debloat rarely holds. Windows feature updates frequently restore default consumer apps and pinned installer links, which means your work disappears after the next major update unless you build in persistence.
For Pro and Enterprise editions:
- Use the Group Policy setting described in the admin section (Turn off cloud optimized content) to block installer links from returning.
- Remove provisioned packages with DISM so new user accounts never receive them.
- Keep a PowerShell script with your removal list and re-run it after each feature update.
For Home edition (no Group Policy editor):
- Use registry tweaks as a substitute. The key
HKLM\SOFTWARE\Policies\Microsoft\Windows\CloudContentwith a DWORD valueDisableWindowsConsumerFeaturesset to1replicates the Group Policy effect on Home. - Schedule a monthly task in Task Scheduler to run your removal script automatically.
- If you're a technician managing multiple Home machines, maintain a clean base image with removals baked in and redeploy rather than re-running scripts repeatedly.
The honest reality: no method is 100% permanent. Major feature updates (like the annual Windows 11 version upgrades) can override policy settings and restore apps. Build a re-audit into your update routine rather than expecting a one-time fix to last forever.
Key Takeaways
The safest and most effective way to remove bloatware from Windows 11 is a three-pass workflow: Settings for obvious apps, PowerShell for stubborn built-ins, and Group Policy or DISM for permanent system-wide changes.
| Point | Details |
|---|---|
| Create a restore point first | Always create a System Restore point before removing any app — it's your fastest recovery option. |
| Use the three-pass method | Settings → PowerShell → DISM/Group Policy covers nearly all bloatware without breaking the system. |
| Respect HRESULT 0x80073CFA | This error signals a protected component; forcing removal can break Windows Update or Windows Security. |
| Removals don't always stick | Major Windows feature updates restore consumer apps; schedule a re-audit after every major update. |
| Tempered as a non-technical path | Tempered's AI optimizer handles background process management and reversible tweaks with a one-click Undo Center, no command line needed. |
The workflow I'd actually recommend
Most guides treat debloating as a one-and-done task. It isn't. Windows 11 is a living system that pushes apps back after updates, and the right workflow accounts for that from the start.
The Settings pass is always worth doing first, even if it feels slow. It's the safest pass, it catches the most obvious targets, and it forces you to actually look at what's installed before reaching for a script. Skipping it to go straight to PowerShell is how people remove something they needed and spend an afternoon recovering.
The keep/remove list is the most underrated part of this whole process. Not because it's clever, but because it makes the re-audit after the next feature update take ten minutes instead of an hour. You already know what you removed and why.
Where I'd push back on conventional advice: GUI tools like O&O AppBuster are genuinely useful, but they're not a shortcut for beginners. They surface packages that most users have no context for, which leads to aggressive removals of things that look like bloat but aren't. Use them after you understand what you're looking at, not before.
The real trade-off in debloating is between speed and reversibility. Scripts are fast. DISM is thorough. But both are harder to undo than a Settings uninstall. If you're not managing a fleet of machines, the extra ten minutes of doing it manually is worth it for the peace of mind.
Tempered handles the safe optimization work for you
Manual debloating works, but it requires time, comfort with PowerShell, and a willingness to re-run scripts after every major update. For users who want the performance gains without the command-line work, Tempered takes a different approach.
Tempered's AI diagnostic scans your live hardware metrics — CPU load, RAM usage, GPU temperature, disk activity — and identifies exactly which background processes are dragging performance down. It then recommends specific, safe changes and applies them with every action tracked in its Undo Center. One click reverses any change. There's no need to know a package name or remember which PowerShell command you ran three months ago.
For users who want a faster path to a cleaner PC without the risk of breaking something, Tempered's free tier gives you a starting point. Try the free AI scan at tempered.to and see what it finds on your system.
Primary sources and further reading
These are the most useful references for commands, admin guidance, and tool downloads. Prefer official project pages and verified GitHub releases for any tool you download.
| Source | Best for |
|---|---|
| Microsoft Support — Uninstall apps in Windows | Official step-by-step for Settings, Start menu, and Control Panel uninstall methods |
| PDQ — How to identify and remove bloatware from Windows 11 | Admin-focused guidance: allowlists, Group Policy, deployment scripts, and update recurrence |
| WinBuzzer — How to remove bloatware from Windows 11 | PowerShell and DISM command reference, winget syntax, provisioned package removal |
| Guide Techly — Safe methods for a new Windows 11 PC | Three-pass workflow overview, time estimates, and common removable app lists |
| WikiHow — How to debloat Windows 11 | Community script guidance and safety caveats for Win11Debloat variants |
| Izoate — How to uninstall apps on Windows 11 | Five-method walkthrough including winget, PowerShell wildcards, and Control Panel |
| Rapid Repairs — Why your laptop is slow | Broader performance troubleshooting context beyond app removal |
Security note: download O&O AppBuster from oo-software.com and BCUninstaller from its official GitHub repository only. Never run a debloat script from an unknown source without reading the full code first.